
How to Transcribe a Video: A Tested, Step-by-Step Workflow
A practical guide to turning video into text: choose the right method, fix names and numbers, and export TXT, SRT, or VTT. Includes real timings and screenshots.
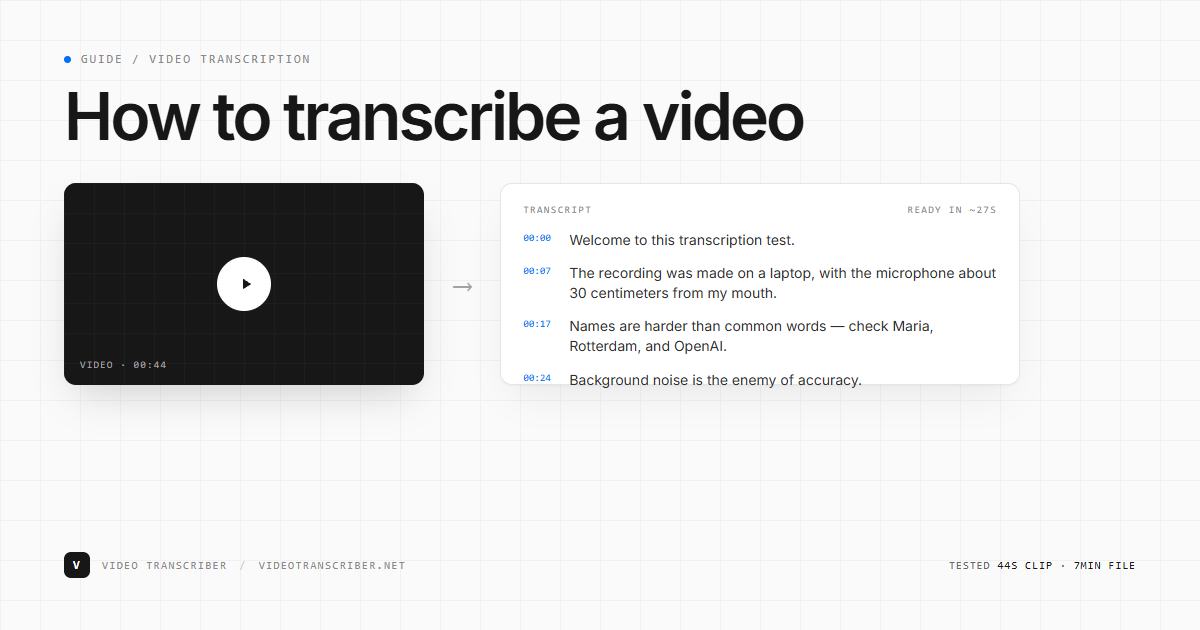
To transcribe a video, you need the audio track, a speech-to-text tool, and a review pass. Upload the file or paste a link, let the tool produce a timestamped transcript, correct names and numbers, then export TXT for reading or SRT/VTT for captions.
Clicking the button is easy. The parts that decide quality are the method, the audio, and the review.
We tested the workflow on two recordings on 8 November 2026: a 44-second clip recorded with a text-to-speech voice, and a 7-minute video with four speakers. The short clip was ready in about 27 seconds. The longer one took about 45 seconds. The screenshots below are from those sessions.
How we tested: On 8 November 2026, we ran two recordings through Video Transcriber: a 44-second clip recorded with a Windows text-to-speech voice and a 7-minute video file. We timed from file selection to a finished transcript, took the screenshots during those sessions, and checked the output against the scripts. We work on Video Transcriber, so this is a documented workflow, not an independent review. The 44-second clip is the one in the screenshots; its audio is a script we wrote, which makes the transcript easy to verify.
What you are making
A video file is a container. The transcription tool ignores the picture and works on the audio track. That is why an MP4, a MOV, and an MP3 of the same interview usually produce the same text.
The output has three parts:
- Words: the spoken content, usually split into sentences or short segments.
- Timing: a start and end time for each segment, so you can jump back to the moment.
- Speaker labels: a guess at who is talking, based on changes in the voice.
A transcript and a subtitle file are different products. A transcript is for reading, searching, quoting, and editing, while an SRT or VTT file is for playback: each cue has a start time, an end time, and one or two lines of text. If you only need a record of what was said, export TXT. If the video will be watched with captions, export SRT or VTT. The same transcript can produce both, but the review standards are different.
Choose a method before you upload
| Method | Best for | The trade-off |
|---|---|---|
| Manual typing | Very short clips, damaged audio, material that cannot leave your machine | Slow, and accuracy depends on the typist |
| YouTube or social captions | Public videos that already have a caption track | No speaker labels, limited export, punctuation varies, captions may be missing |
| AI transcription | Interviews, lectures, meetings, creator videos | A review pass is still required |
| Human transcription | Legal, medical, regulated, or publication-grade work | Higher cost and longer turnaround |
Start with the source. If the video is already on YouTube and has captions, check the caption track before you run it through another tool. YouTube's automatic captions may not be ready at upload time and can misrepresent accents, dialects, and background noise; Google recommends reviewing and editing them before publishing. The YouTube Help page on automatic captioning covers the limitations and the edit workflow.
If the captions are missing or rough, a dedicated transcriber gives you a cleaner starting point; for a normal interview, lecture, or creator video, an AI first pass plus a careful review is usually the best trade. Manual typing is the fallback for short clips or audio that speech recognition cannot handle. A human service is the right call when the text has to hold up in a legal, medical, or regulated context.
Step 1: Get the best audio you can
The recording decides more than the model. A close microphone in a quiet room beats a distant microphone with noise suppression.
What we changed in the test:
- Recorded in a quiet room, with no music under the voice.
- Kept the microphone about 30 centimeters from the speaker's mouth.
- Used a single voice for the short clip, so the transcript had one speaker.
- Wrote the script with names and numbers on purpose: "Maria", "Rotterdam", "OpenAI", "thirty centimetres", "forty two characters", and "six seconds".
The transcript kept all three names and normalized the numbers to "30 centimeters", "42 characters", and "6 seconds" — a good result on a clean clip. It is not a promise that every name will survive a noisy room.
If the recording already exists, use the best source you have: the original camera or recorder file, not a compressed copy exported from a social platform. Do not play the video through laptop speakers and record it with a phone. That adds room echo and a second lossy encode. If the only copy you have is a social-media export, download the highest-quality version the platform offers and check whether the audio has been re-encoded before you send it to a transcription service.
Step 2: Upload the file or paste the link
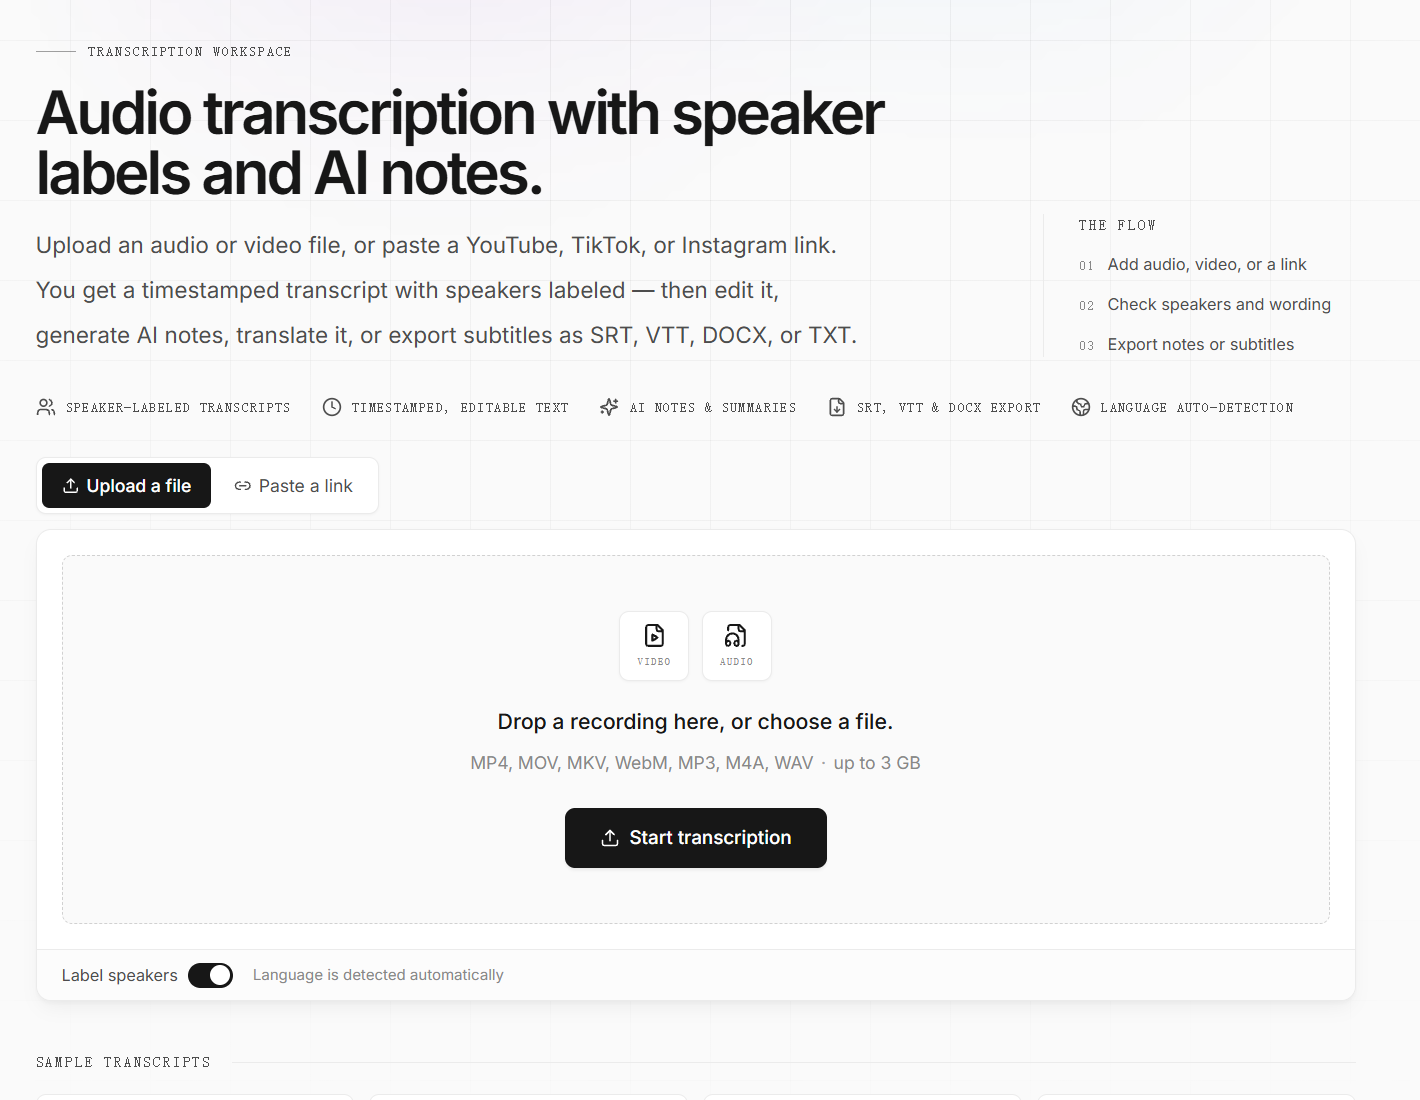 The upload panel, with speaker labels on.
The upload panel has two tabs. "Upload a file" accepts MP4, MOV, MKV, WebM, MP3, M4A, and WAV, up to 3 GB per file. "Paste a link" handles public YouTube, TikTok, and Instagram URLs, plus direct MP3 and MP4 links. If the video requires a login, an age check, or a region you are not in, the link route may fail; download the file first and use the upload tab instead.
Three settings matter at this point:
- Language is detected automatically. If the speaker switches languages mid-recording, expect errors at the switch.
- Label speakers separates voices. Leave it on for interviews and meetings. For a single narrator it adds one label and does not hurt.
- File length matters on the free path. Without an account, the upload limit is 5 minutes per file. Sign in to use monthly minutes and transcribe longer files; the current plans are on the pricing page.
Click "Start transcription" and let the page move to the editor. Do not close the tab during the upload. If you want to try the workflow, start on the transcription page or use the YouTube transcript page for a public video.
Step 3: Let the transcript finish
The tool uploads the file, runs speech recognition, and returns segments with timestamps. In our test, the 44-second clip was ready in about 27 seconds and the 7-minute file in about 45 seconds. Both timers cover the upload and the processing, so they reflect what you actually wait for.
The 7-minute file was 9 MB and produced four speaker labels, SPEAKER_00 through SPEAKER_03. The 44-second clip was 1.3 MB and produced one label. The last segment started at 00:39. The clip itself is 44 seconds, so the final seconds had no speech.
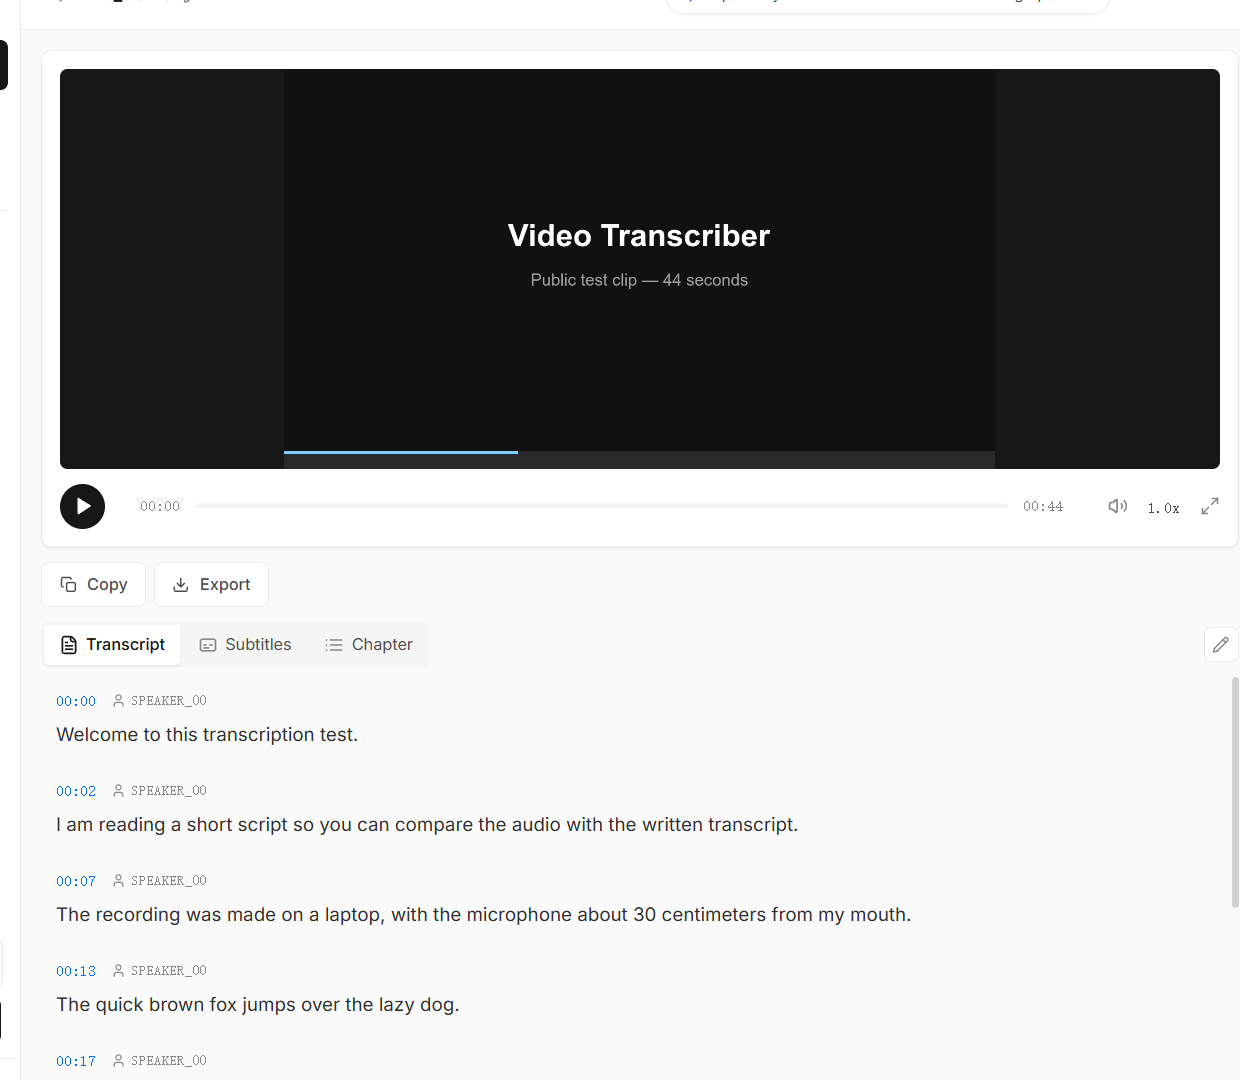 The editor after transcription, with timestamps and a speaker label.
Two things to notice in the editor:
- The timestamps are clickable. Use them to jump to the moment instead of scrubbing the player.
- The speaker label is a hypothesis — it is based on changes in the voice, not on a roster of participants. Overlapping speech is where it breaks.
Step 4: Review names, numbers, and speaker changes
This is the step that separates a usable transcript from a rough draft. Read the transcript with the audio playing, at least for the first minute and for every proper noun. A one-hour interview does not need a line-by-line listen if the audio is clean, but the first five minutes and every section where the topic or speaker changes are worth the extra time.
Our checklist, in the order we use it:
- Names and brands. Search for each one. In the clean clip, "Maria", "Rotterdam", and "OpenAI" were all correct. In a noisy recording, these are the first words to fail.
- Numbers and units. The model wrote "30 centimeters" from "thirty centimetres" and "42 characters" from "forty two characters". That normalization is useful, but verify dates, prices, dosages, and model numbers by ear.
- Speaker changes. Check the first line after each change. That is where a label drifts or a segment gets split.
- Homophones and jargon. If a sentence reads oddly, play the audio. The model guessed a word that sounds similar.
- Filler words. Decide whether "um" and "uh" belong in the output. A readable transcript usually drops them; a verbatim record keeps them.
- Punctuation and paragraph breaks. AI punctuation is usually reasonable. It is not an editor. Read the first two paragraphs aloud; if you run out of breath, the sentence is too long.
The editor is for wording. Fix a name or a number, save the segment, and keep moving. Speaker labels come from the diarization pass. Use them to follow the conversation, and keep your own list of who spoke.
If the transcript will be published, do a second pass on a different day. You will catch names and awkward phrases that looked fine while you were listening.
Step 5: Export the format you need
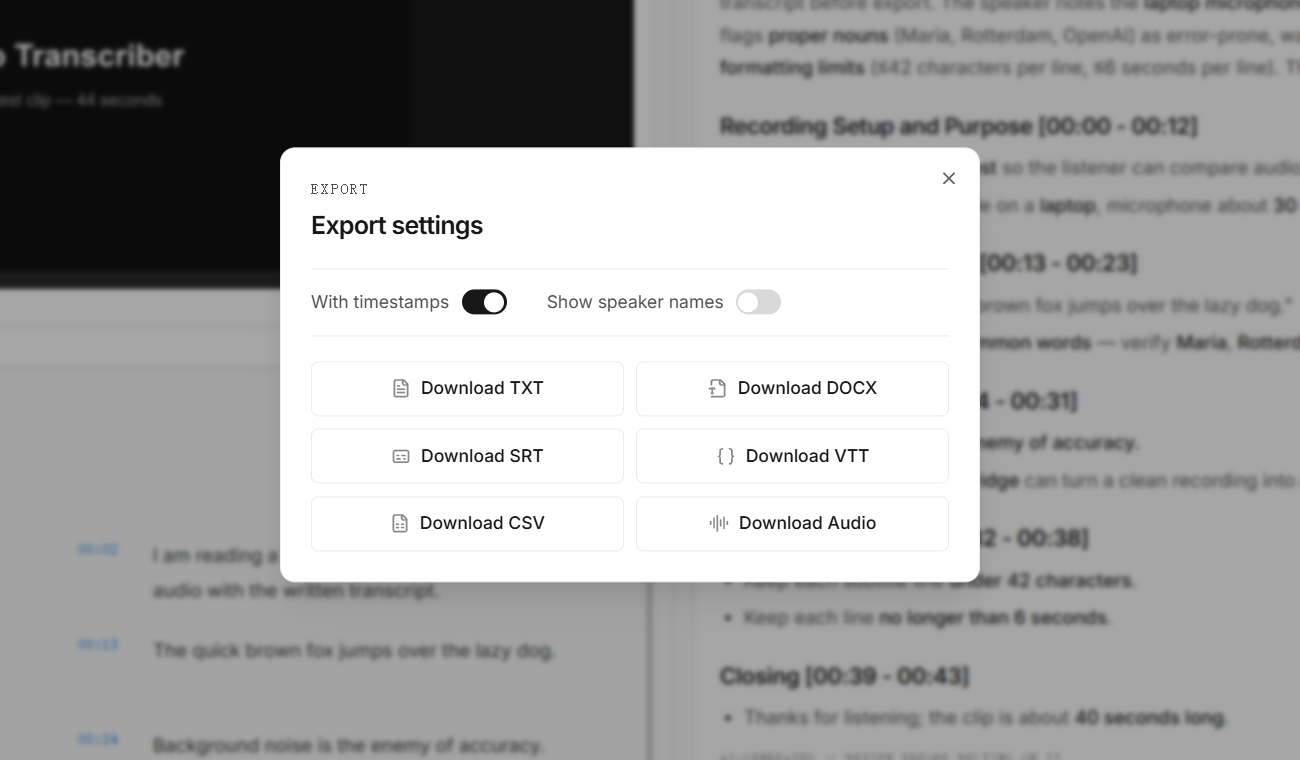 The export dialog, including TXT, SRT, and VTT.
The export dialog has TXT, DOCX, SRT, VTT, CSV, and audio. The timestamp and speaker-name toggles apply to the text exports.
| Format | Use it for | What to check |
|---|---|---|
| TXT | Reading, notes, pasting into a document | No timing unless you enable timestamps |
| DOCX | Client deliverables, editable scripts | Heading and paragraph styles after import |
| SRT | YouTube, Premiere, DaVinci Resolve, VLC | Line length, cue duration, speaker changes |
| VTT | HTML5 players and web video | Same rules as SRT, plus the WEBVTT header |
| CSV | Spreadsheets, analysis, bulk edits | One row per segment; check the delimiter |
| Audio | Podcast or audio-only reuse | Bitrate and loudness after export |
For subtitles, the same text needs different formatting. Netflix's English timed-text guide caps Latin-script lines at 42 characters, allows at most two lines per cue, and sets a maximum cue duration of 7 seconds. Those are broadcast rules, not laws, but they are a good default. The Netflix style guide has the full list. For web players, use WebVTT; the W3C specification defines the file structure.
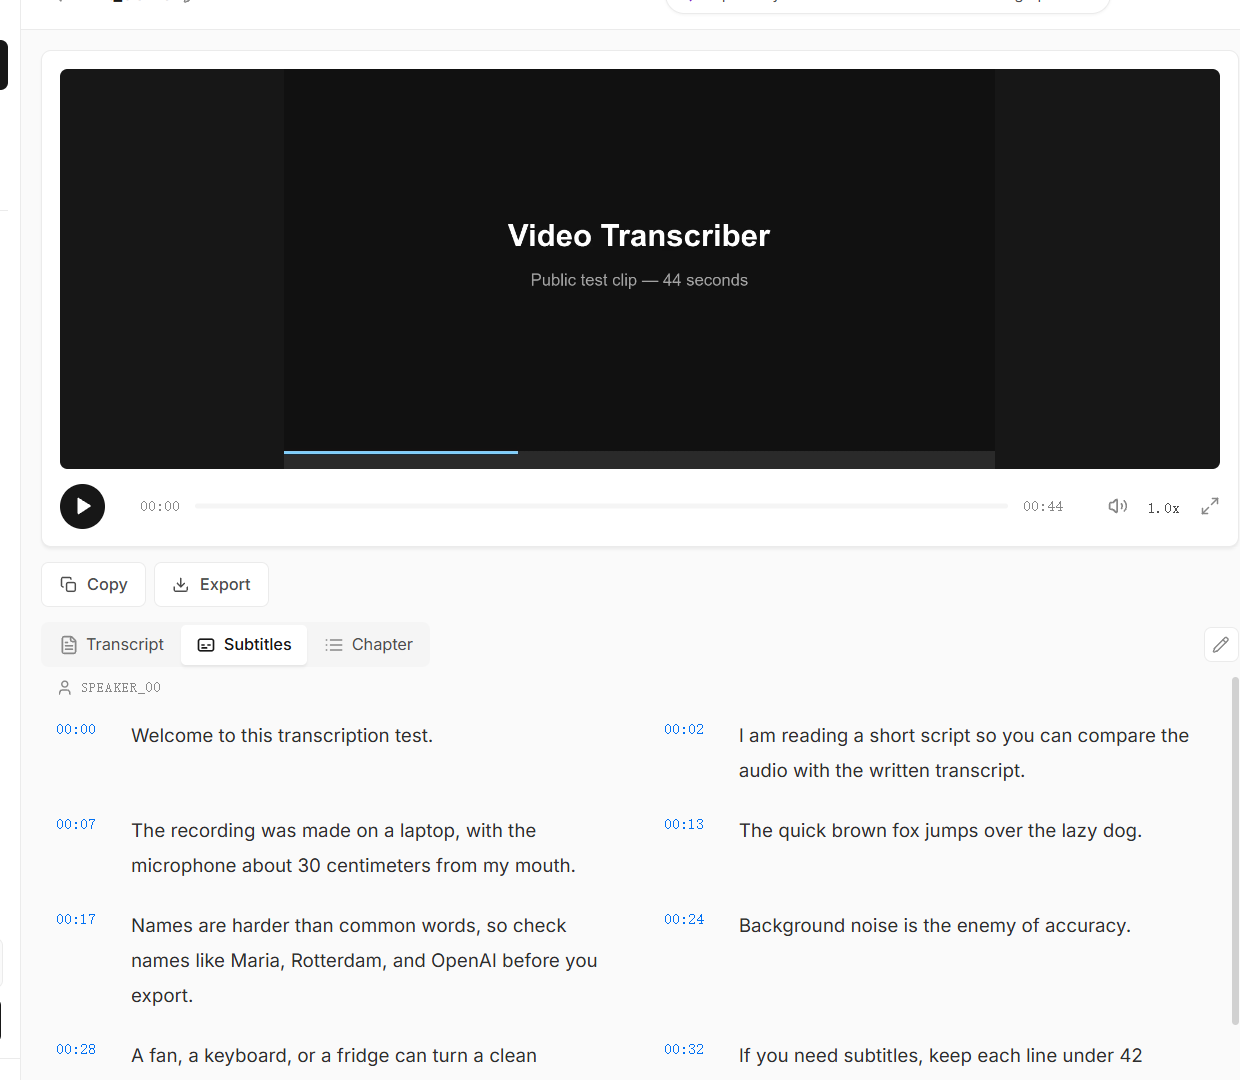 The Subtitles tab, showing cue text and timing.
The Subtitles tab in the editor shows the cue text in two columns. It is a preview, not a styling tool. Font, size, and position belong in the player or the video editor.
If you are uploading captions to YouTube, use YouTube Studio's subtitles page and choose "Upload file" with timing. Google's help page on adding subtitles covers the exact steps. Replace the automatic track instead of adding a second track with the same language.
How long it takes
| Test | Length | Time to a finished transcript |
|---|---|---|
| 44-second TTS clip | 0:44 | About 27 seconds |
| Four-speaker video | 7:00 | About 45 seconds |
Both numbers are wall-clock time from selecting the file to seeing the transcript. They include the upload. The 7-minute file was larger and had more speech, so both the upload and the transcription had more work to do.
A practical rule: short clips finish in under a minute on a normal connection. Long files put more weight on upload speed and the service's queue. If you are uploading a 500 MB recording from a hotel Wi-Fi connection, the upload can take longer than the transcription, which is why we report wall-clock time instead of model speed. These are two measurements, not a benchmark; your numbers will move with file size, language, and network.
Where AI transcription still fails
The clean test clip is the easy case. The failures to watch for on a real project:
- Crosstalk. Two people talking over each other produce merged text and unstable speaker labels. Split the segment by hand or mark it as inaudible.
- Music and singing. Lyrics often come back as nonsense. If the music is not part of the content, mute it before transcription.
- Heavy accents and uncommon names. The model has to guess from sound. Add the names to your review list before you start.
- Technical vocabulary. Product names, internal acronyms, and drug names are high-risk. Keep a glossary open while you review.
- Bad microphone placement. A laptop mic across a table picks up room echo. No tool fixes that cleanly after the fact.
- Numbers in context. "15" and "50" can sound alike. Check any number that changes the meaning of the sentence.
If the transcript will be used in a legal, medical, safety, or financial context, have a human review it. A human transcription service is slower and more expensive — that is the point: someone is accountable for the text.
Privacy and consent
Get consent before recording a call or an interview. If the recording includes client data, medical information, or anything covered by an NDA, check the tool's storage and retention policy before uploading. In Video Transcriber, uploads go to Cloudflare R2 and you can delete an asset from My Assets when you are done. The privacy policy has the details.
Do not upload a confidential recording to a free tool just because the button is convenient. The transcript is only as private as the storage behind it.
FAQ
Can I transcribe a video without uploading it?
Some tools run speech recognition in the browser and keep the file on your device. They usually download a model first, and long files take longer. Video Transcriber uploads the file to process it. If the file cannot leave your machine, use an on-device tool.
What video formats can I upload?
MP4, MOV, MKV, WebM, MP3, M4A, and WAV. The upload limit is 3 GB per file; anonymous uploads are limited to 5 minutes. Sign in for longer files and monthly minutes.
Can I transcribe a YouTube or TikTok link?
Yes. Paste a public YouTube, TikTok, or Instagram link in the "Paste a link" tab. Direct MP3 and MP4 URLs also work. If the platform has captions, the transcript can use them; if not, the tool falls back to speech recognition.
How accurate is the transcript?
It depends on the audio. In our clean 44-second test, names and numbers came back correctly. A noisy room, overlapping speakers, or unfamiliar jargon will produce errors. Review names, numbers, and speaker changes before publishing.
Can I export SRT or VTT?
Yes. Open Export, turn on timestamps, and choose SRT or VTT. For subtitles, keep lines under 42 characters, two lines per cue, and cues under 7 seconds.
Does it label different speakers?
Yes, when Label speakers is on. The labels are based on voice changes, so overlapping speech needs manual correction. Check the labels against the voices before you rely on them.
Can I translate the transcript?
Yes. The Translate & Dub dialog can translate the transcript into another language; the AI video translator page explains the workflow. Check the translated names and idioms before publishing; machine translation has the same review problem as transcription.
Try it yourself
Transcribe a video in seconds.
Upload a file or paste a link — free, no sign-up required.
Start a transcription